Drawing with Scissors: Beginners
Summary
Mixed Media
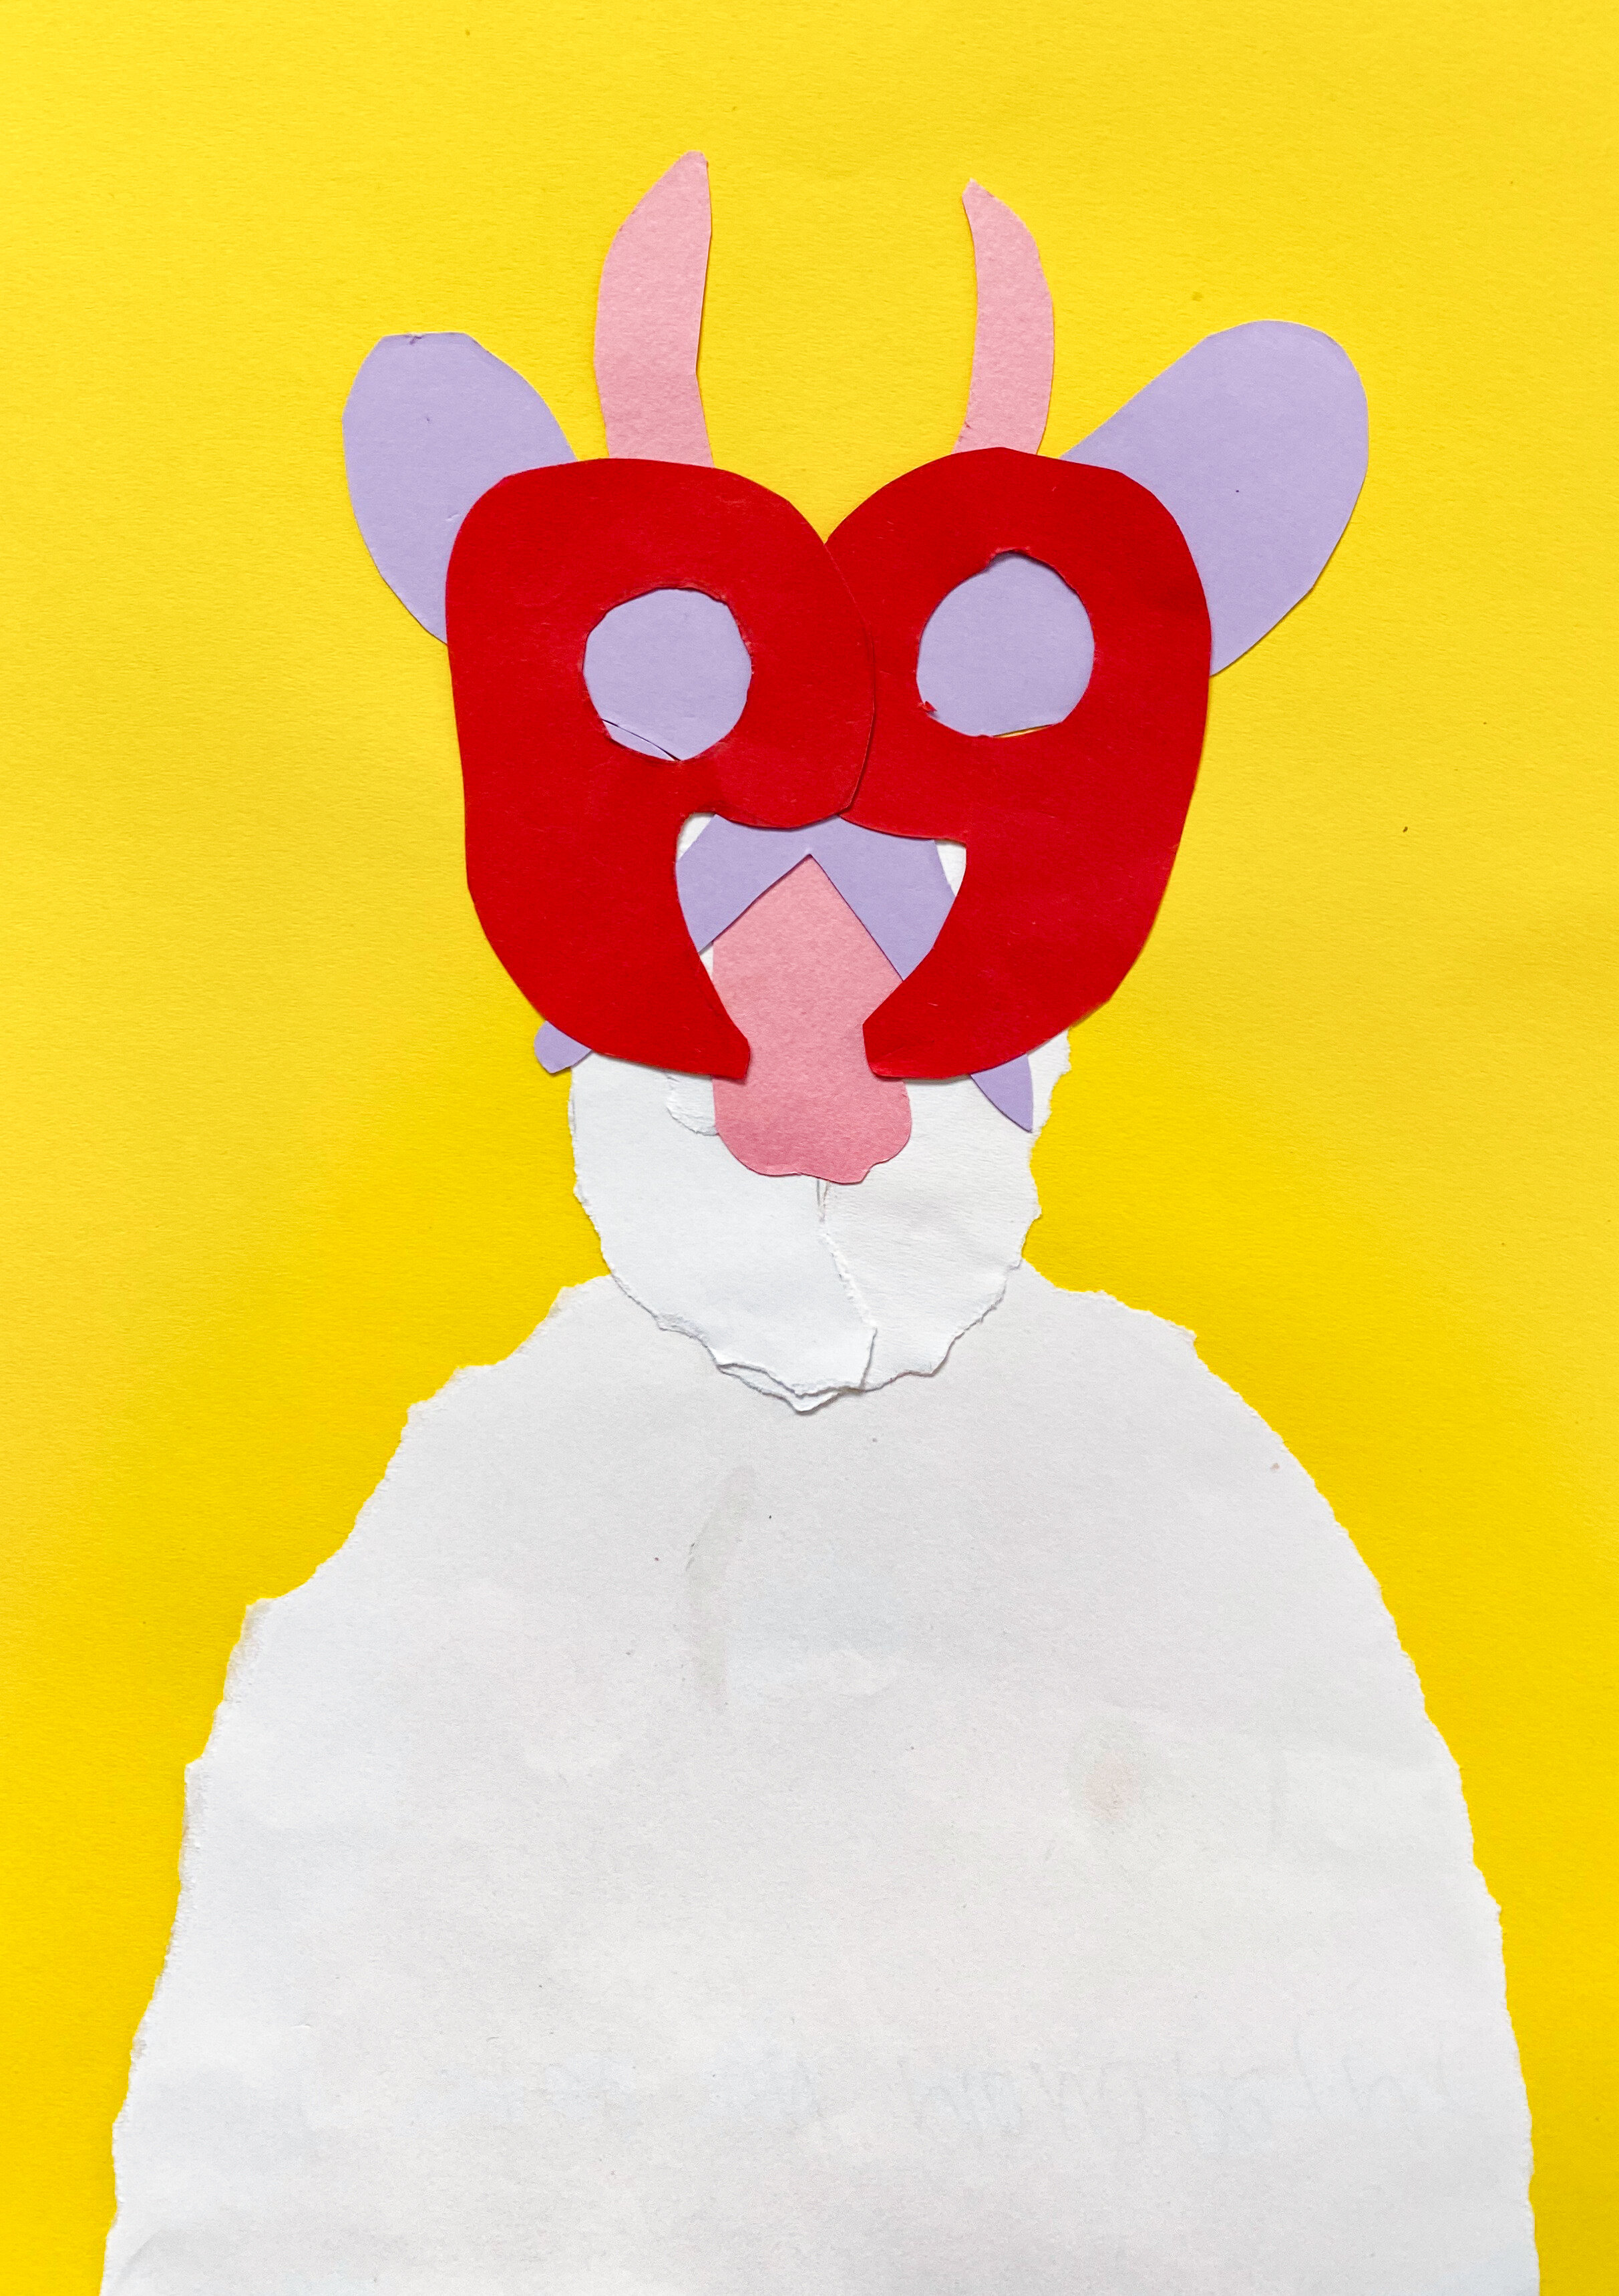
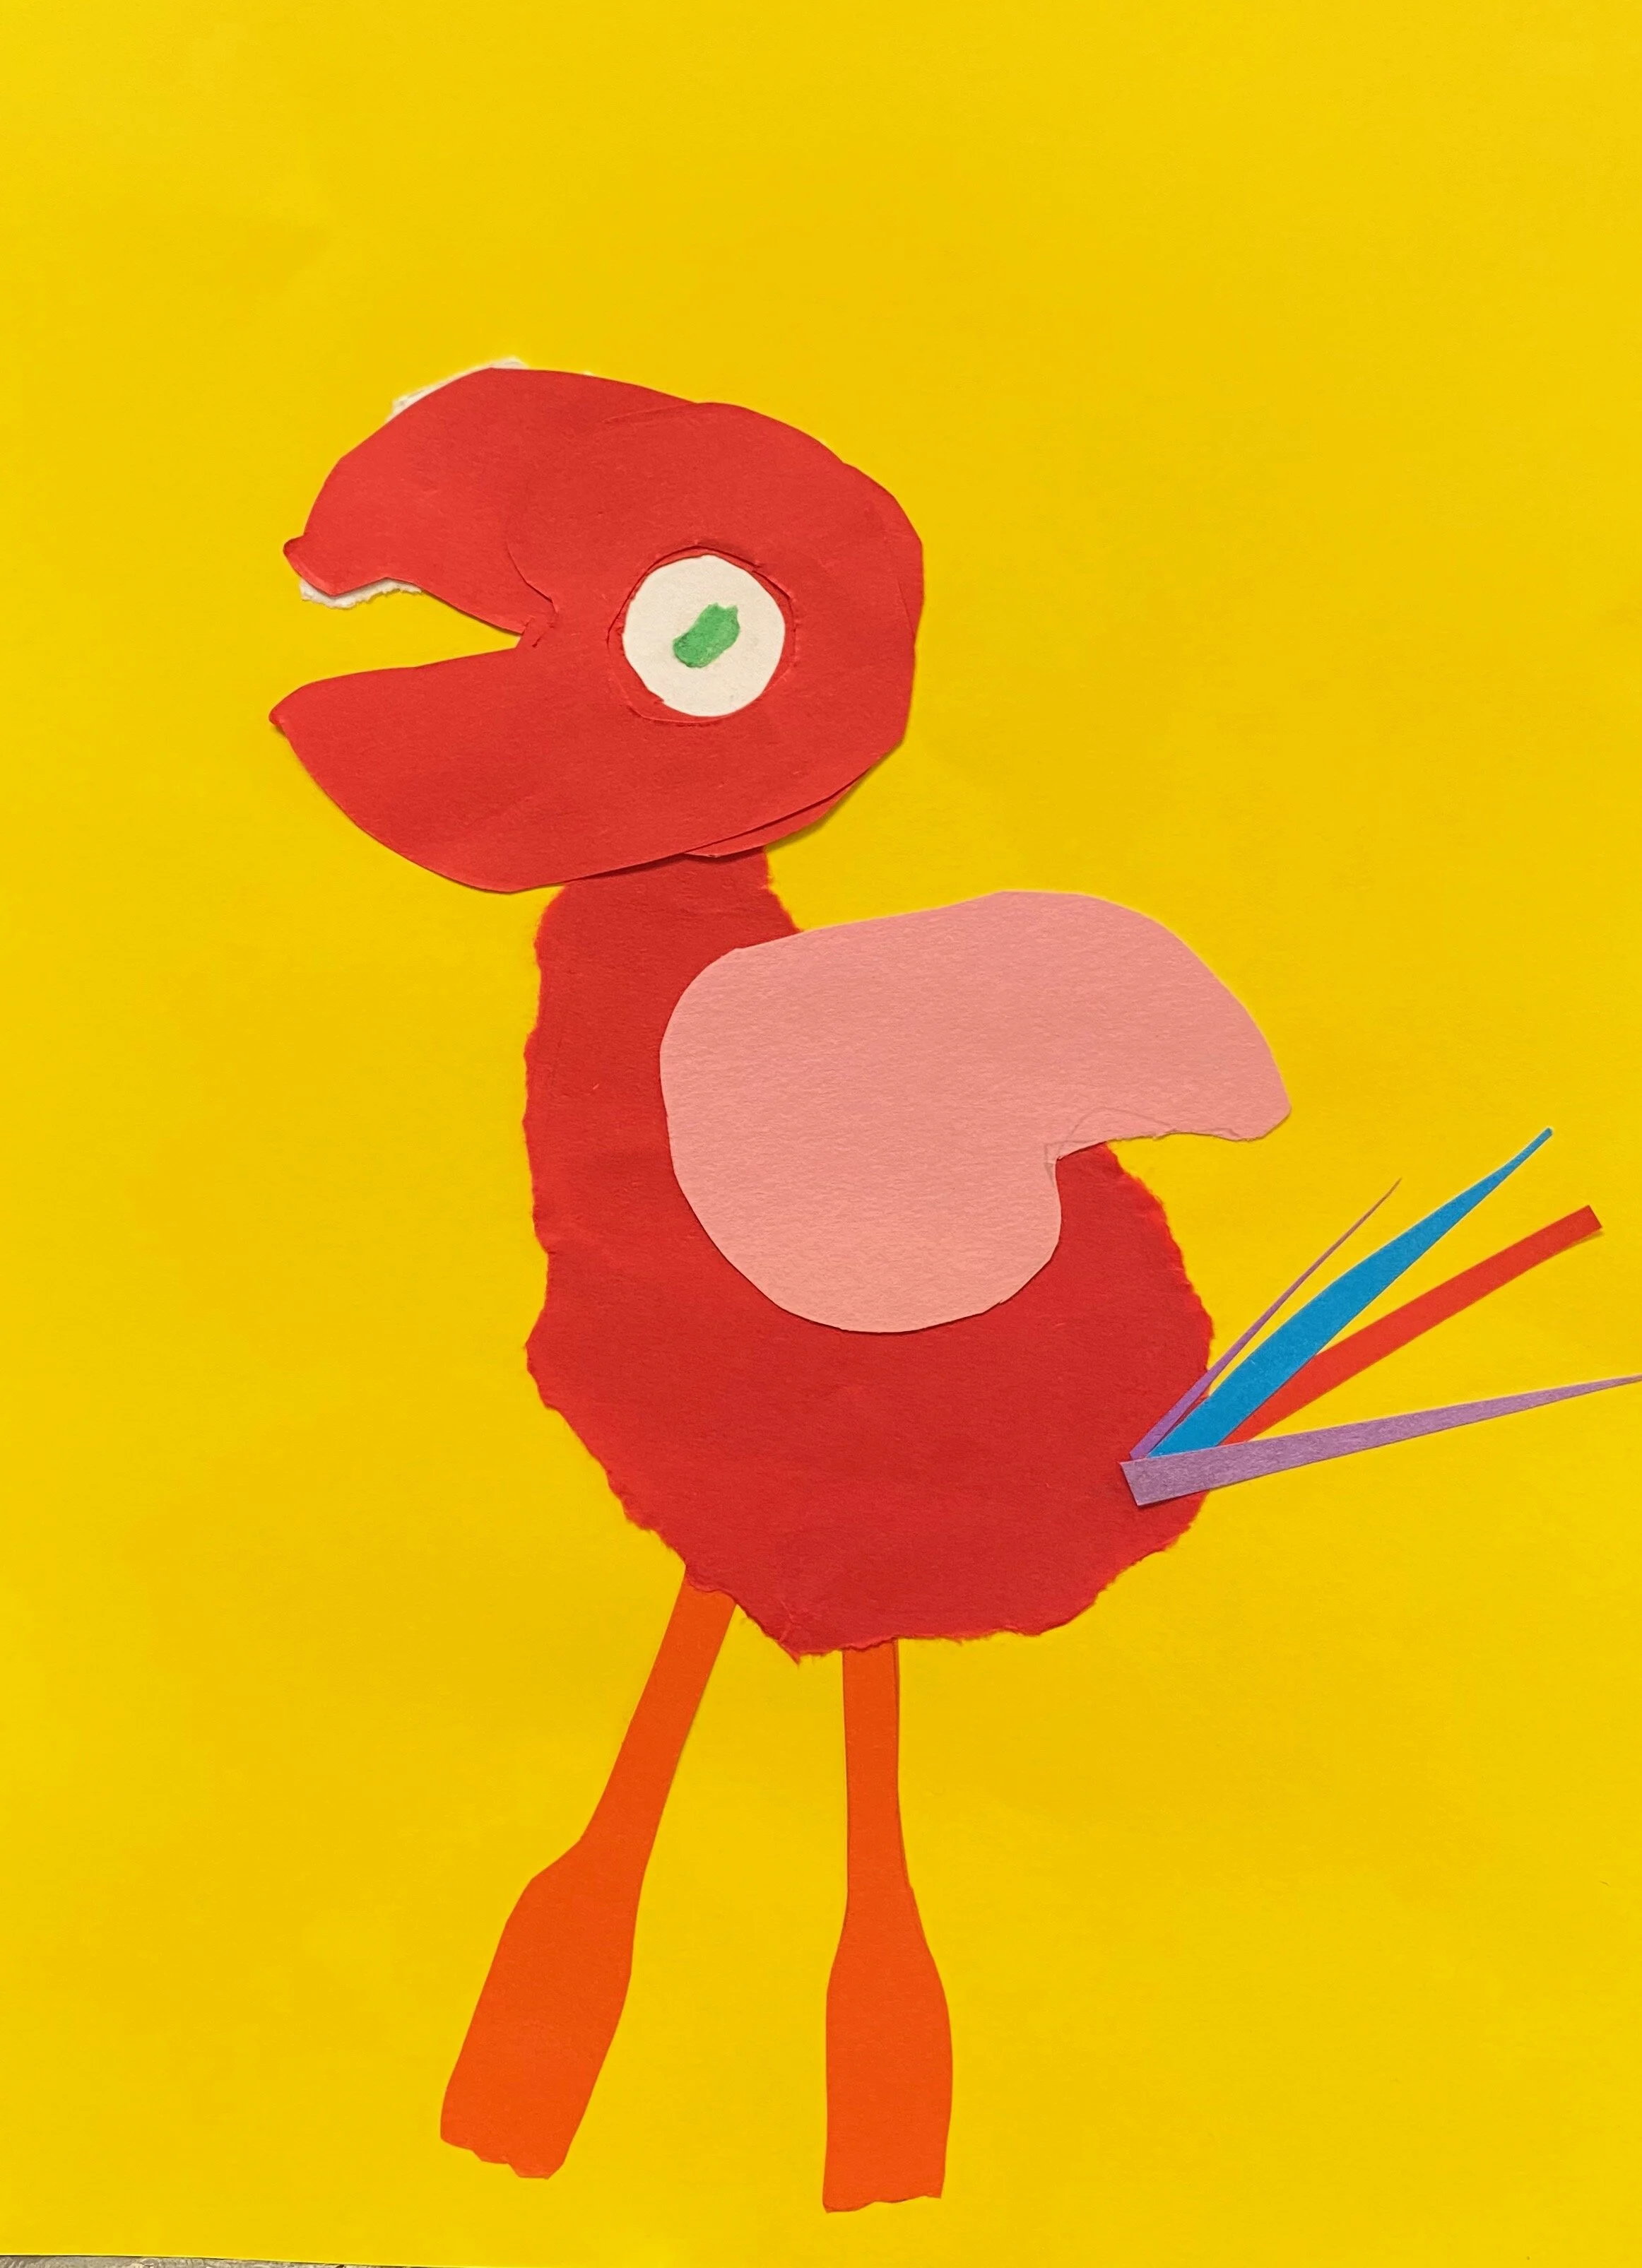
Drawing with scissors is a technique that follows in the footsteps of master artist Matisse in creating lines and shapes using only colored paper. This unique approach to image making allows the artist to experiment with color and composition to better understand balance. Artists will use cutting and tearing to define a variety of shapes to be arranged on a colored background to create a completed artwork. Students will also look to the work of Giuseppi Archimboldo in creating their own assembled animals.
Essential Terms
Balance: the distribution of the visual weight of objects, colors, texture, and space
Cutting: the art form of cutting paper with sharp scissors or a knife
Tearing: to split the fibers of something by pulling apart, usually so as to leave ragged or irregular edges
Objectives
Students will be able to create a balanced composition using cut and torn paper.
Students will be able to develop a color scheme within their artwork.
Students will be able to neatly cut or tear a desired shape.
Master Artist / Historical References
Henri Matisse
Giuseppi Archimboldo
Age Level(s)
5 - 6 years old, 7 - 9 years old
Needed Materials
9 x 12" Construction Paper
Scissors
Glue or Glue Stick
Learning Path
Beginner
Intermediate
Downloads
Project Instructions (PDF)
Attributions
Virtual Learning Project Developer: Augustine Smith
Curriculum Developer: Tamah Minnis
Step 1
Choose your base color paper. This paper will remain intact.
Step 2
Choose the colors of paper you would like to use for the rest of your artwork.
Step 3
Find a household object that you would like to transform. Trace this object onto your paper.
Step 4
Cut or tear along the lines you have drawn.
Step 5
Once you have cut and torn your shape, use paper scraps to create a collaged animal creation. Try multiple compositions before gluing them down. Is your composition balanced? Are there too many shapes in one area? Is there a large blank space? Take your time looking at your arrangements to find what works best.
Step 6
Once you have chosen your composition, glue down your paper cut outs to create your finished artwork!
Step 1
Step 3
Step 4: Tearing
Step 4: Cutting
Step 5
Step 6
Finished artwork
Bonus Tips
Tearing paper can create an edge with more texture and depth than a cut edge. Experiment with both cutting and tearing and find what combination works best for your unique artwork.
Take photos of your multiple paper arrangements to compare your compositions and color combinations. This makes it easier to choose which one truly works best.