Potato Printmaking: Advanced
Summary
Printmaking
In this project, students will use a potato and acrylic paint to create a unique relief print. Relief print originated in East Asia, and was used to create designs for dyed textiles, before being adopted by the west to express a narrative in book printing. Students will look to the work of Jasper Johns to learn about mark making, and think about the textures and colors they will create in their own work
Essential Terms
Relief Print: An image created when ink is applied to the surface of a carved object which is then applied to paper or fabric.
Mark Making: The different lines, dots, marks, patterns, and textures we create in an artwork.
Stencil: A thin sheet of cardboard, plastic, or metal with a pattern or letters cut out of it, used to produce the cut design on the surface below by the application of ink or paint through the holes.
Objectives
Students will be able to create a carved printing block from a potato.
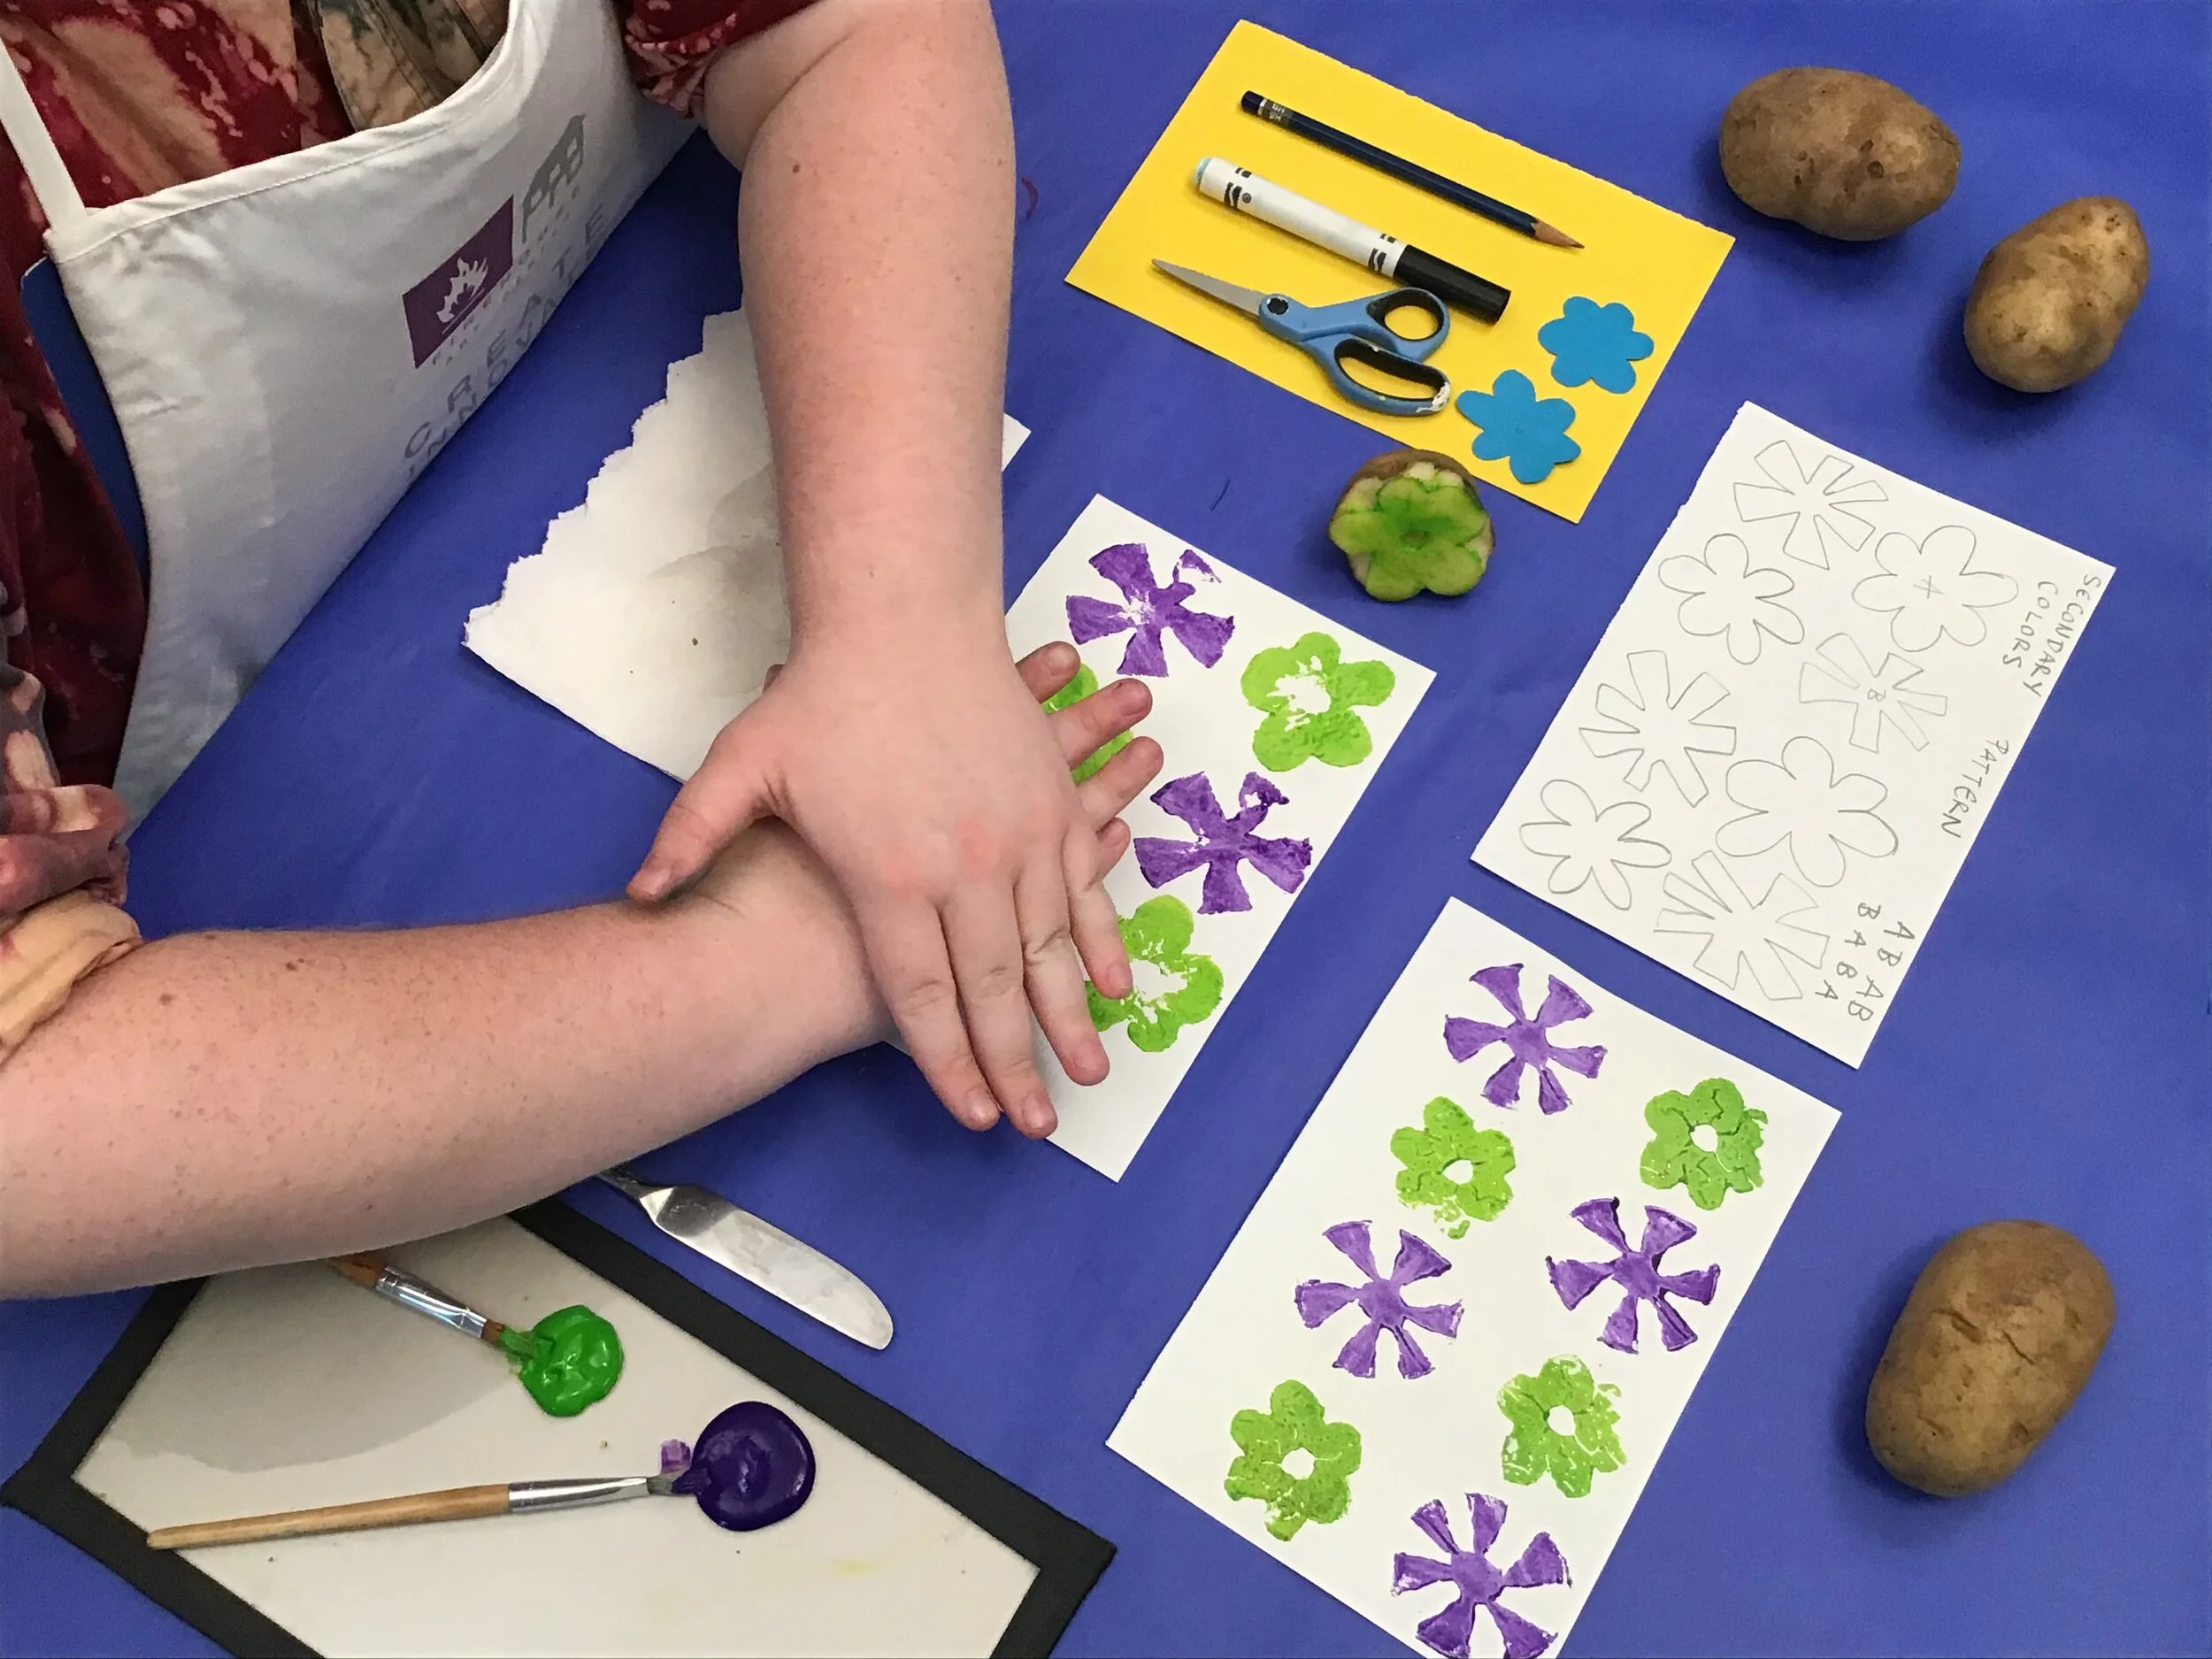
Students will be able to layer potato stamps to create secondary and tertiary colors.
Students will be able to use a potato stamp as a mark making tool.
Master Artist / Historical References
Jasper Johns, Small Numbers in Color, 1959
Age Level(s)
10 - 13 years old
Needed Materials
Potato
Carving tools: knife, paperclip, sharp pencil
Rag or paper towel for drying and clean up
Acrylic paint
Brush
Paper or fabric for printing
Learning Path
Beginner
Intermediate
Advanced
Downloads
Project Instructions (PDF)
Attributions
Virtual Learning Project Developer: Augustine Smith
Curriculum Developer: Tamah Minnis
Step 1
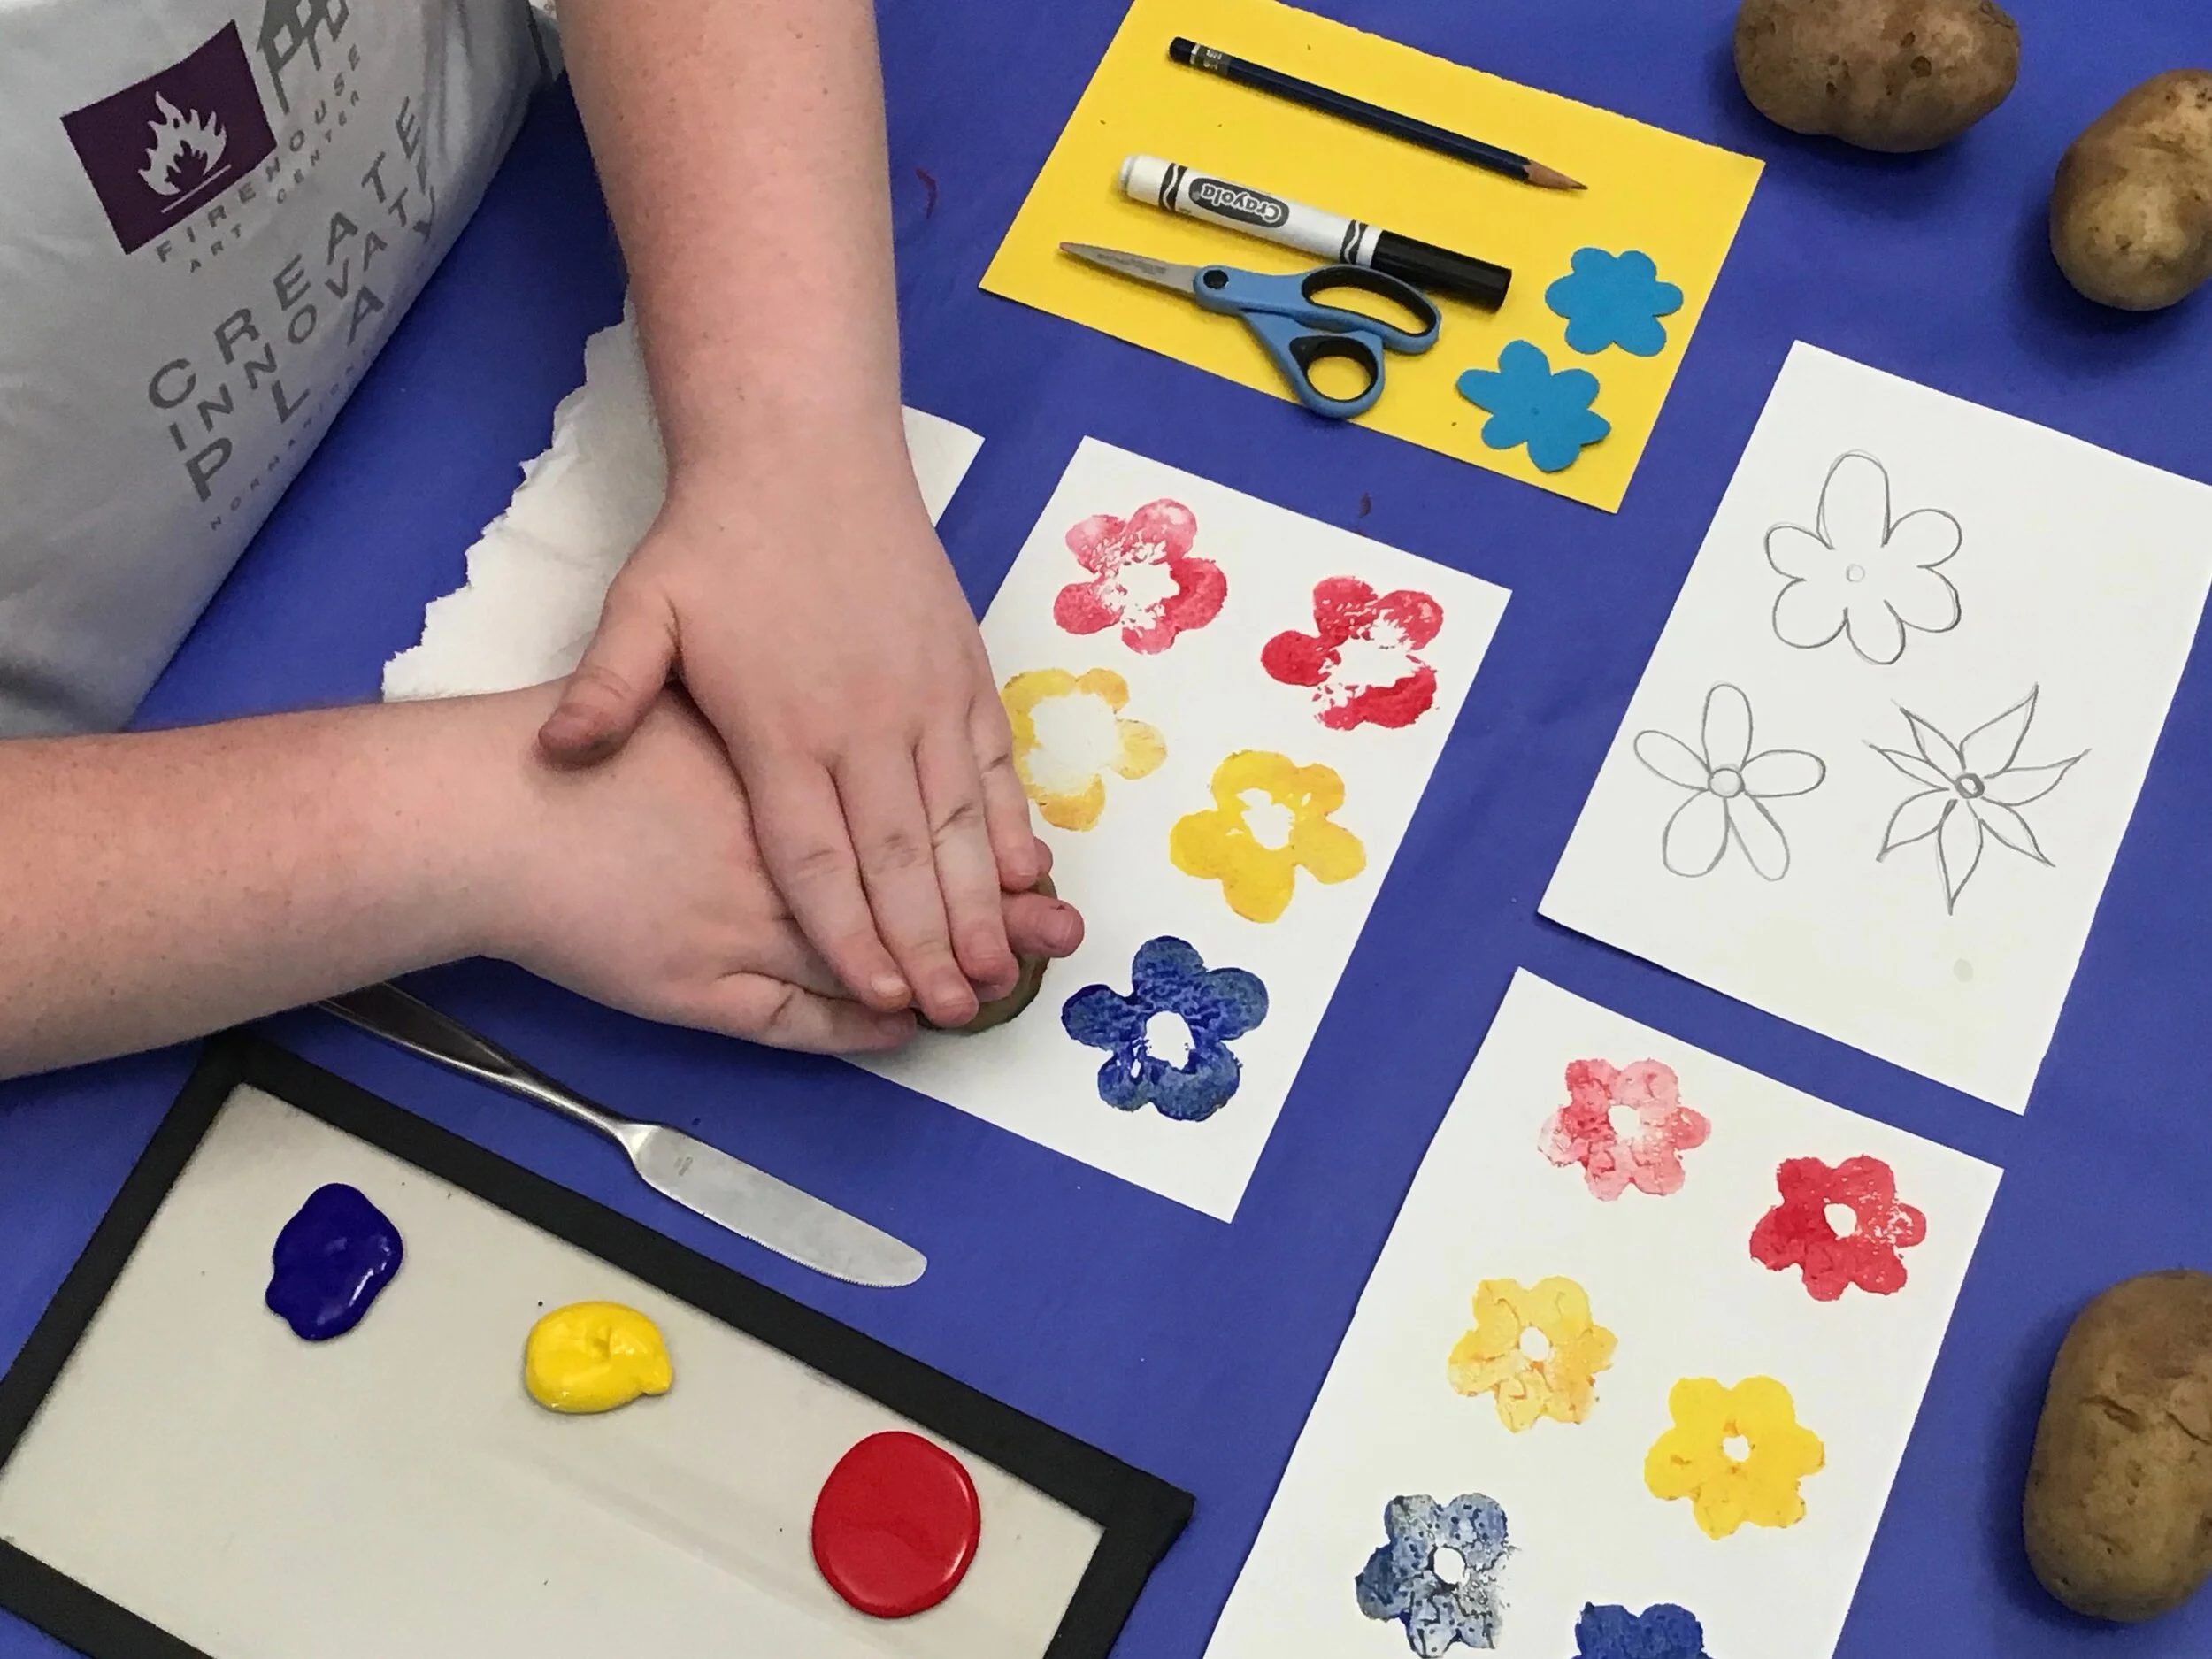
Sketch some ideas for your printed design.
Step 2
Once you have decided what you want your design to be, create a stencil by tracing half of a potato so you know the outline of the shape.
Step 3
Cut the potato in half - you can make up to two stamps out of one potato!
Step 4
Lay your stencil onto the potato and apply your design to the potato by carving an indented line, either with a sharp pencil or paper clip, around the stencil.
Step 5
Carve around your design using your desired carving tool. A knife works Carve around your design using your desired carving tool. A knife works well for older artists, but the curved end of a paper clip is great for artists not quite old enough for sharp objects. Remember, anything that is carved away will become negative space, or the white of the page, and anything left behind will become your printed image.
Step 6
Pat the surface of the potato dry.
Step 7
Carve 3-5 of these potato stamps to combine for a final composition.
Step 8
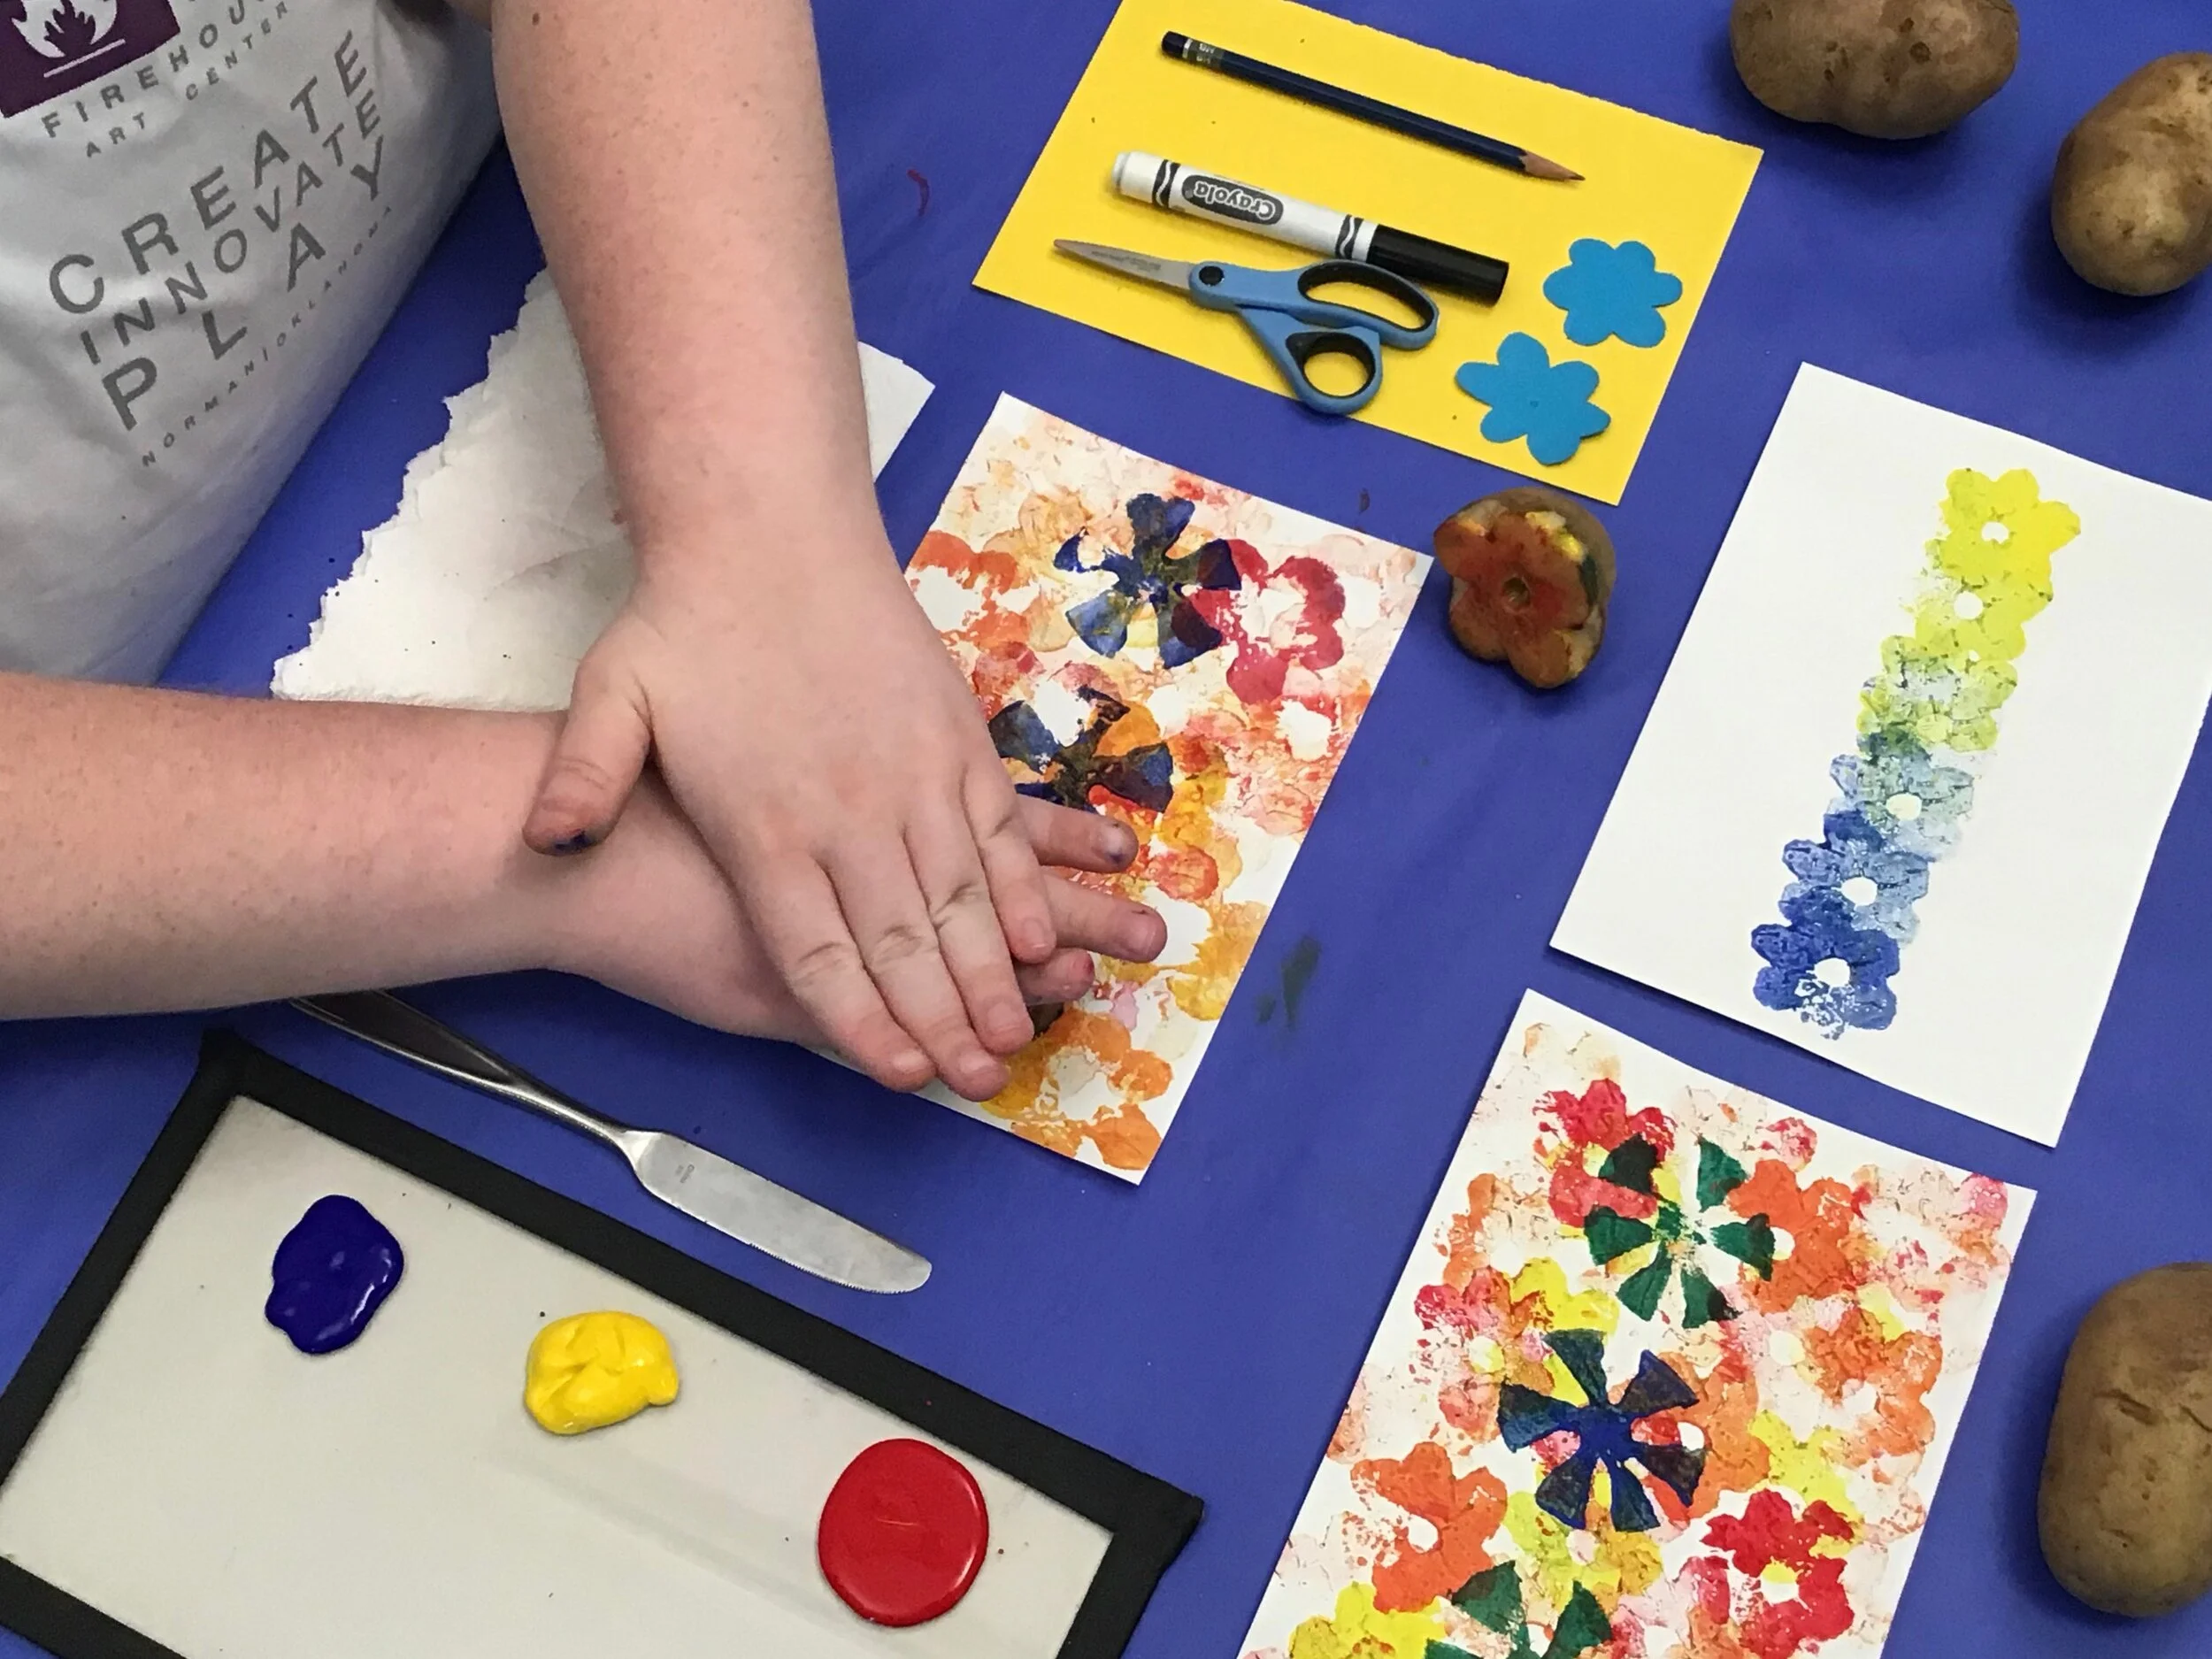
Use a brush to apply a generous coat of acrylic paint to your design.
Step 9
Align your potato printing block with your scrap paper and apply pressure for 3 seconds. This will reveal your potato stamp image!
Step 10
Use your potato stamps to overlap images and create new colors on your final paper. Think about how your stamp shapes work together to create something new!
Step 2: Cutting Potato
Step 2: Creating Stencil Outline
Step 3: Creating Stencil Design
Step 3: Cutting Stencil Design
Step 4
Step 5
Step 7
Step 8
Step 9
Bonus Tips
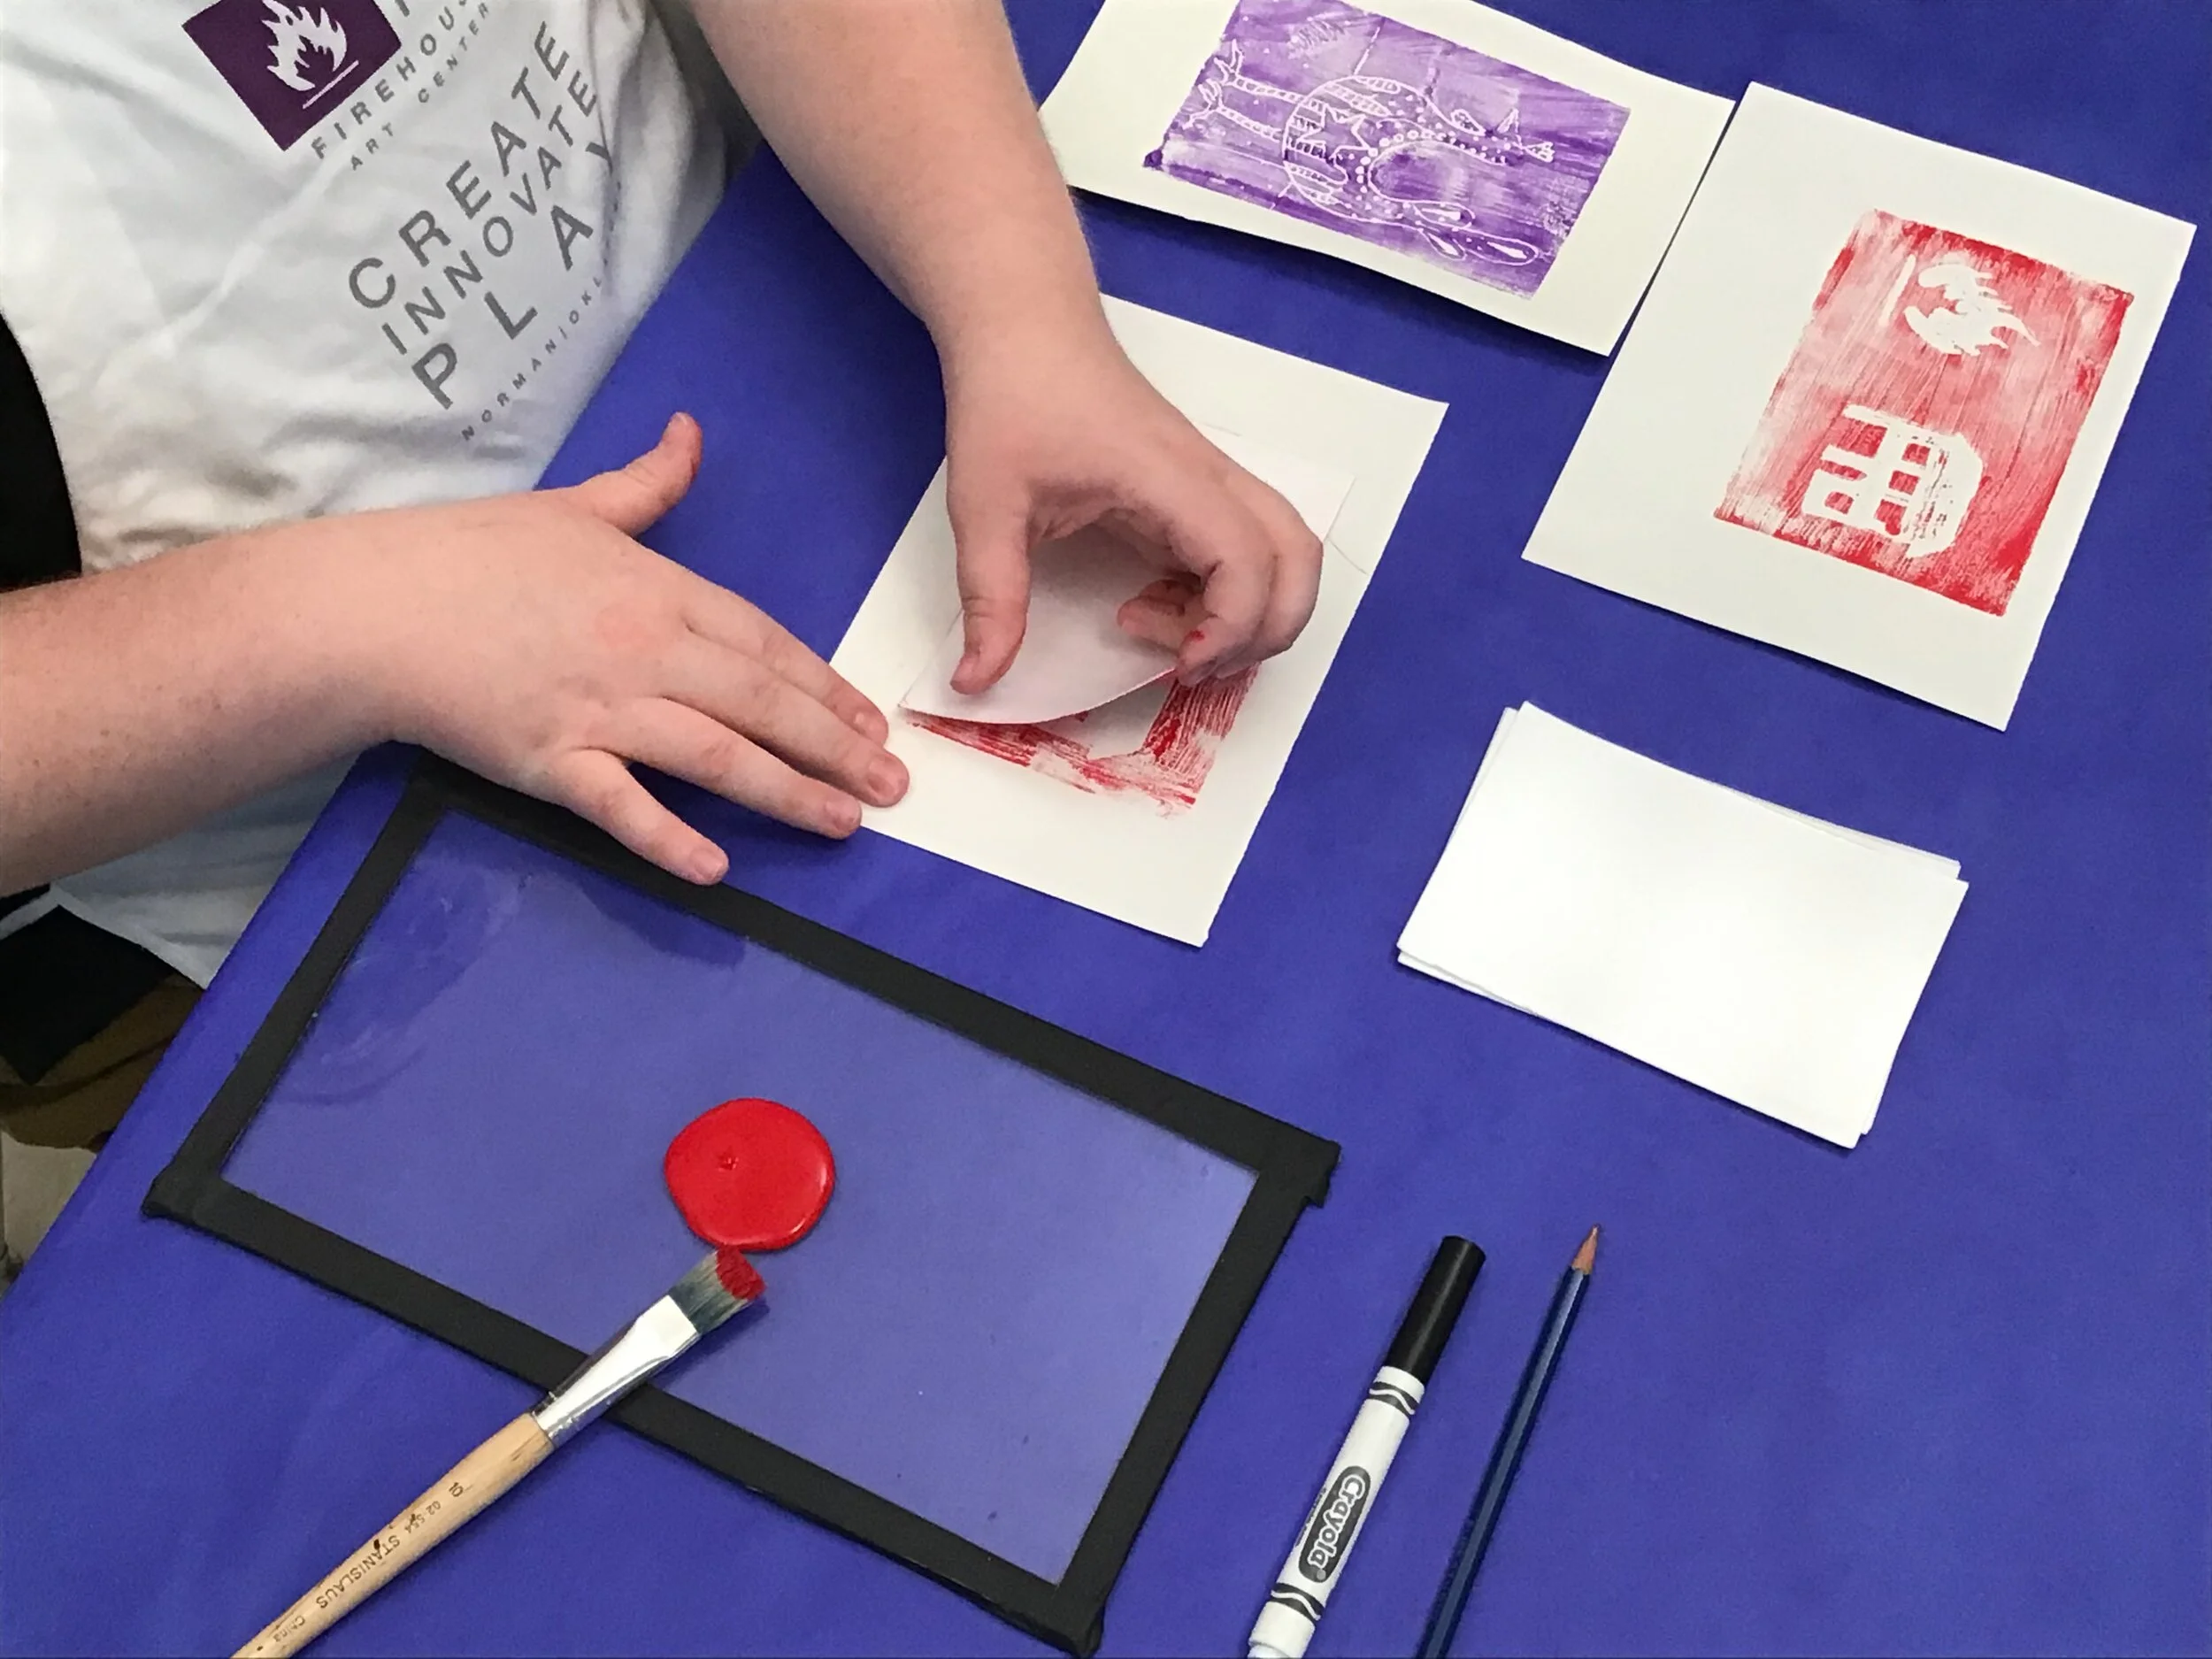
Remember the image you carve will be reflected, or mirrored, when you go to print it.
Consider texture! What is the natural texture of the potato? Does this change with how much pressure or ink you use?
Try printing your stamp a second time without inking it between, this more translucent mark is called a ghost print!